Version 1.5 of Retrohook is here! This release required a bit more time and focus, but surfaces significant no code advancements to the platform. Here is the rundown:
Writing to EHRs with HL7v2
With the capability to securely read from EHRs over MLLP, Retrohook now supports the next step: writing to EHRs. The system can process workflows that accept a custom HTTPS POST request, translate it into an HL7v2 message using the workflow configuration, and publish this message to the EHR over MLLP.
Getting Started
To begin writing to EHRs, you will need:
- A production Retrohook account with an environment deployed to your cloud infrastructure.
- Retrohook Network version
1.5or higher installed.
During deployment a few new infrastructure components, such as an SNS topic and an SQS queue, will be added to your environment to manage workflows and ensure timely message delivery to the EHR.
Workflow Process
The above diagram illustrates the runtime flow of a message from the Webhook to the EHR. Messages are handled within a promise chain, ensuring a response is returned from the POST call.
Workflow Builder Updates
Creating Workflows
To create workflows that write to EHRs:
- Select HTTPS JSON as the Event Source.
- Select MLLP HL7v2 as the Action.
This configuration allows you to accept a JSON payload and translate it into an HL7v2 message.
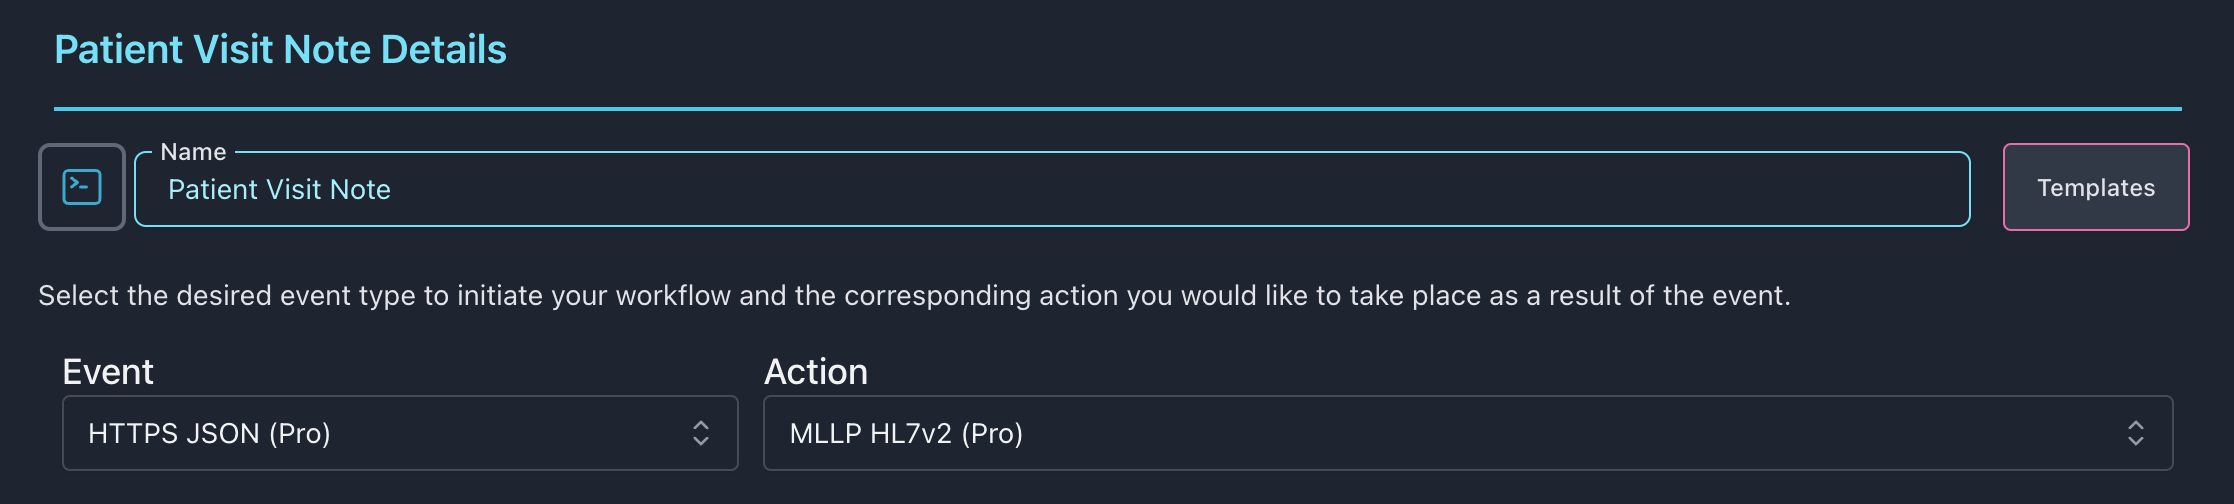
The UI updates to reflect the selection. The system leverages a sample message for rapid mapping, allowing you to customize your payload to match the HL7v2 sample message structure that aligns with the EHR.
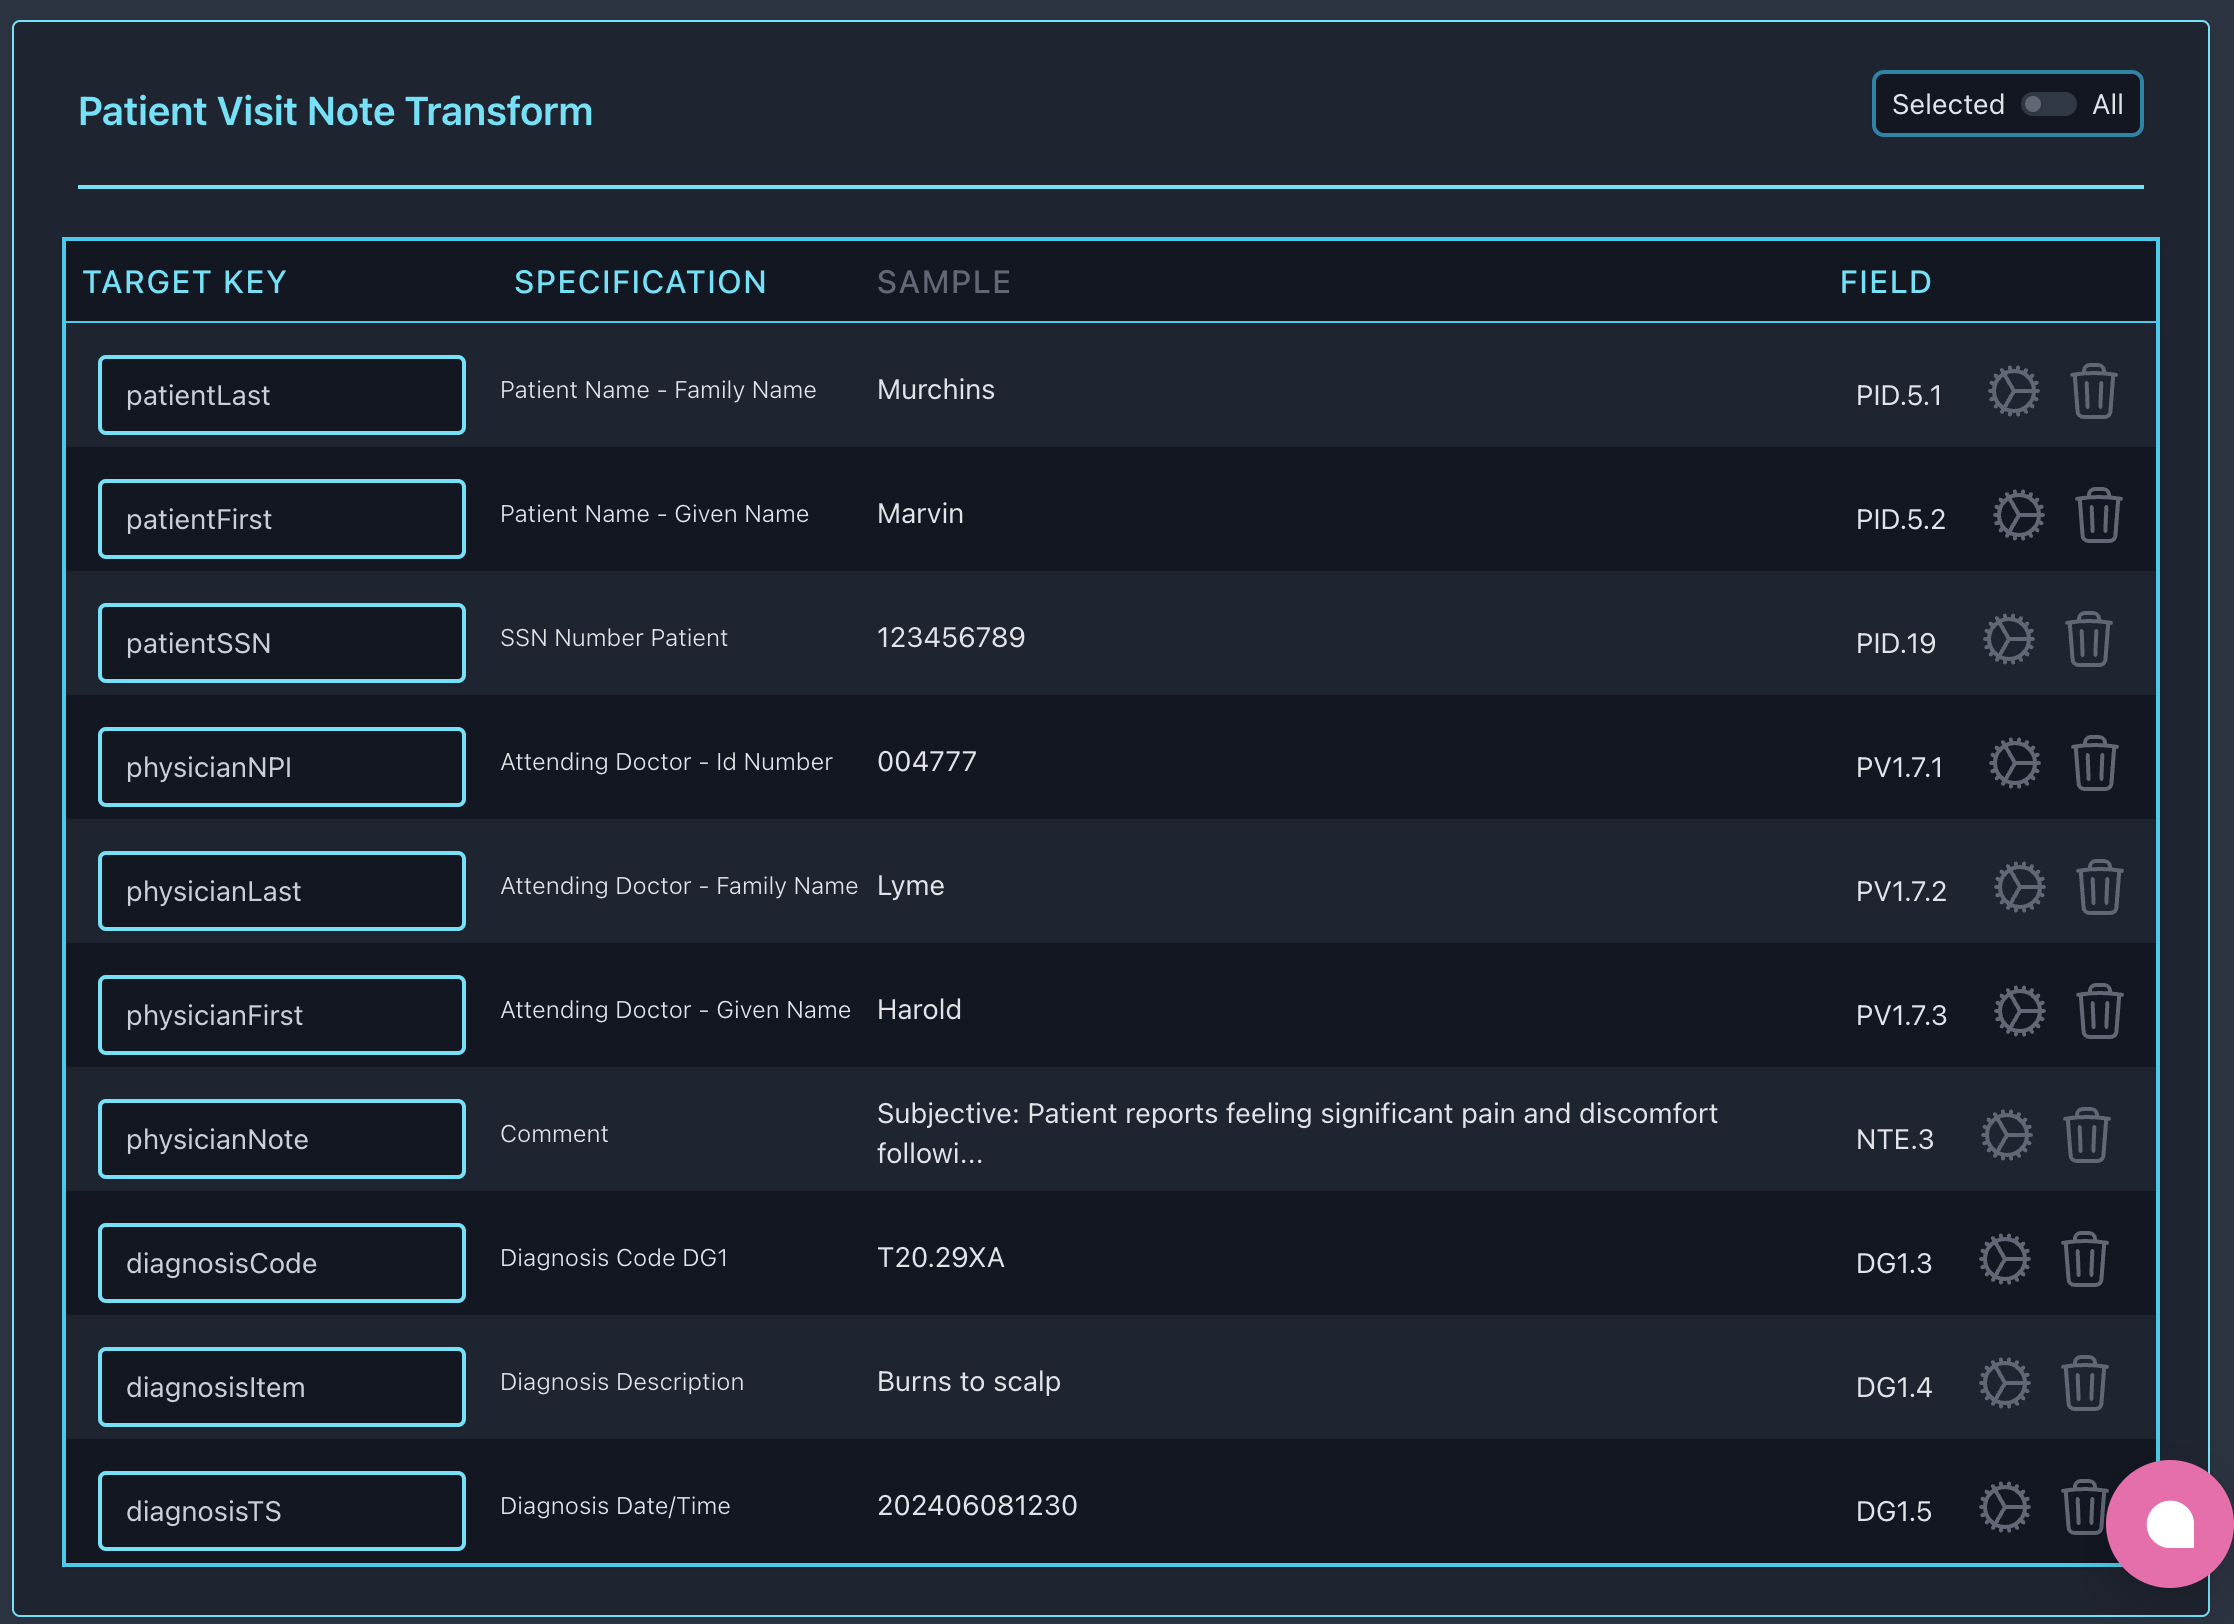
Configuration
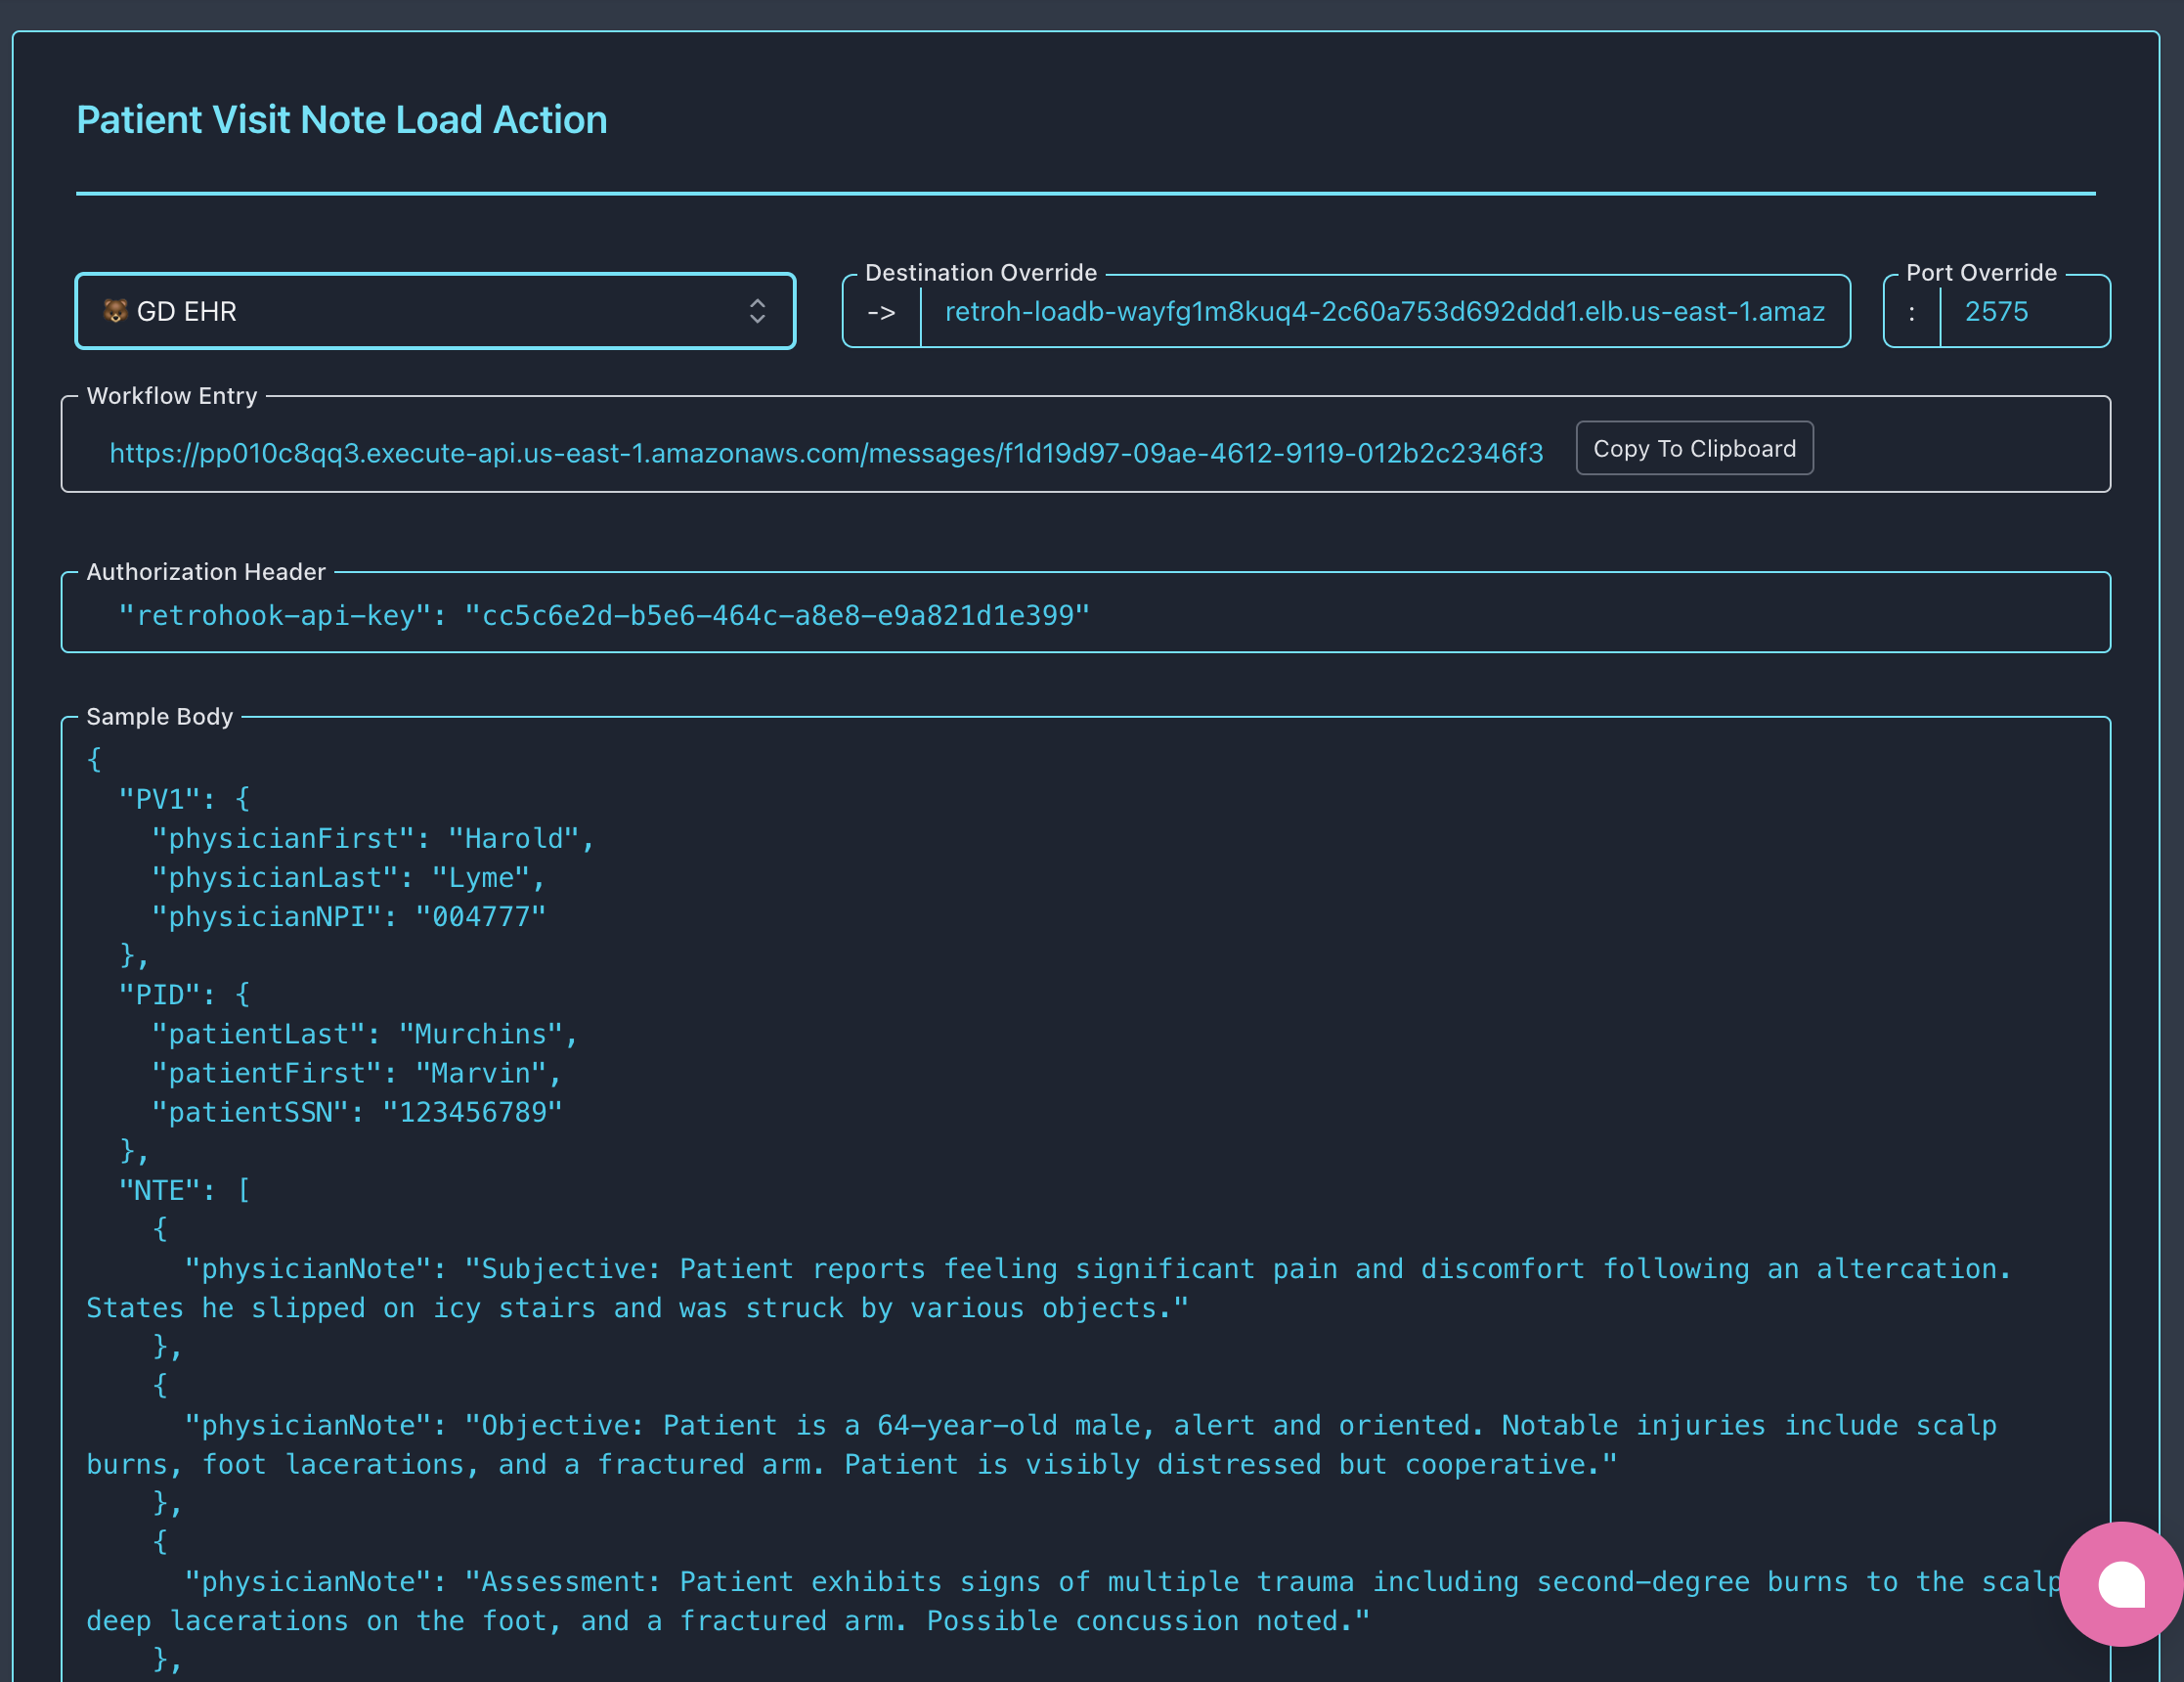
During the Load configuration, you can:
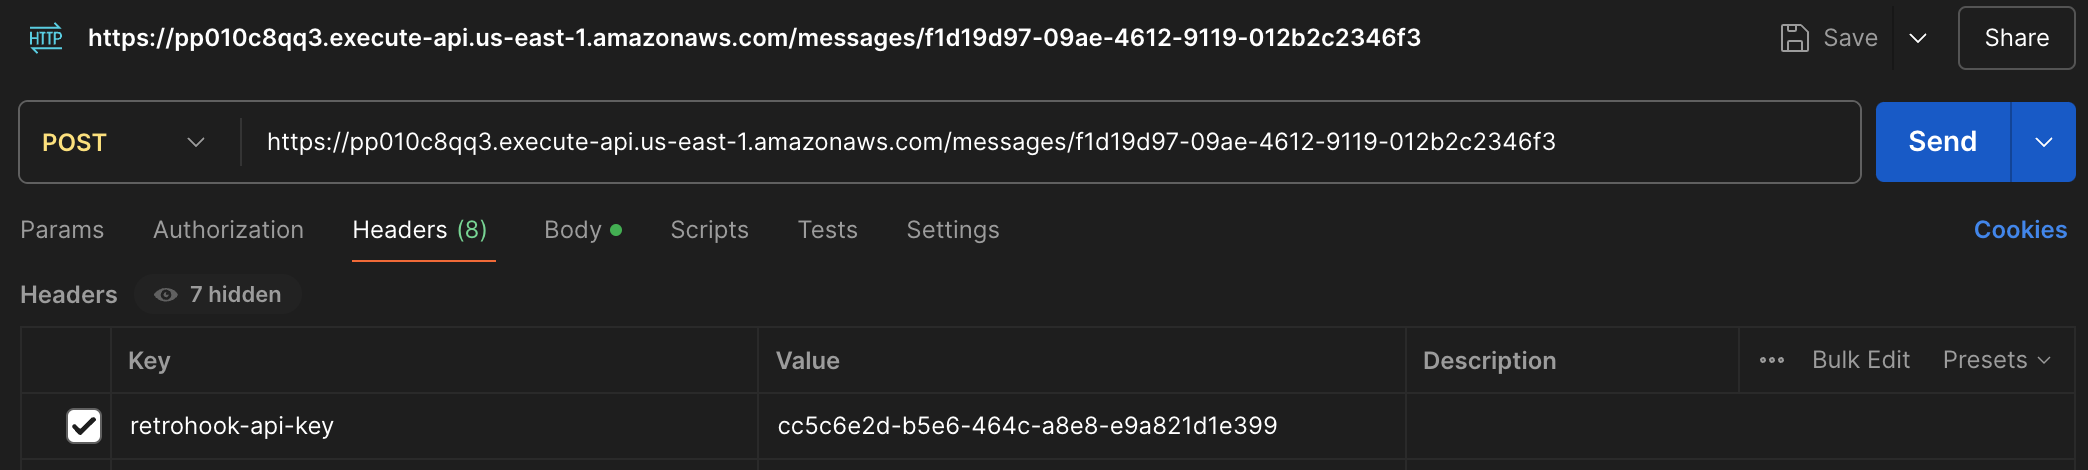
Select an existing connection or provide a server location (IP, DNS) and port for the MLLP server where the message will be published. An API Gateway HTTPS API is generated during the environment deployment. The endpoint is displayed in the Load configuration. This is the endpoint you will POST to in order to trigger the workflow.
For added security, the request must include the authorization header and identifier in the URL to ensure it comes from a trusted source.
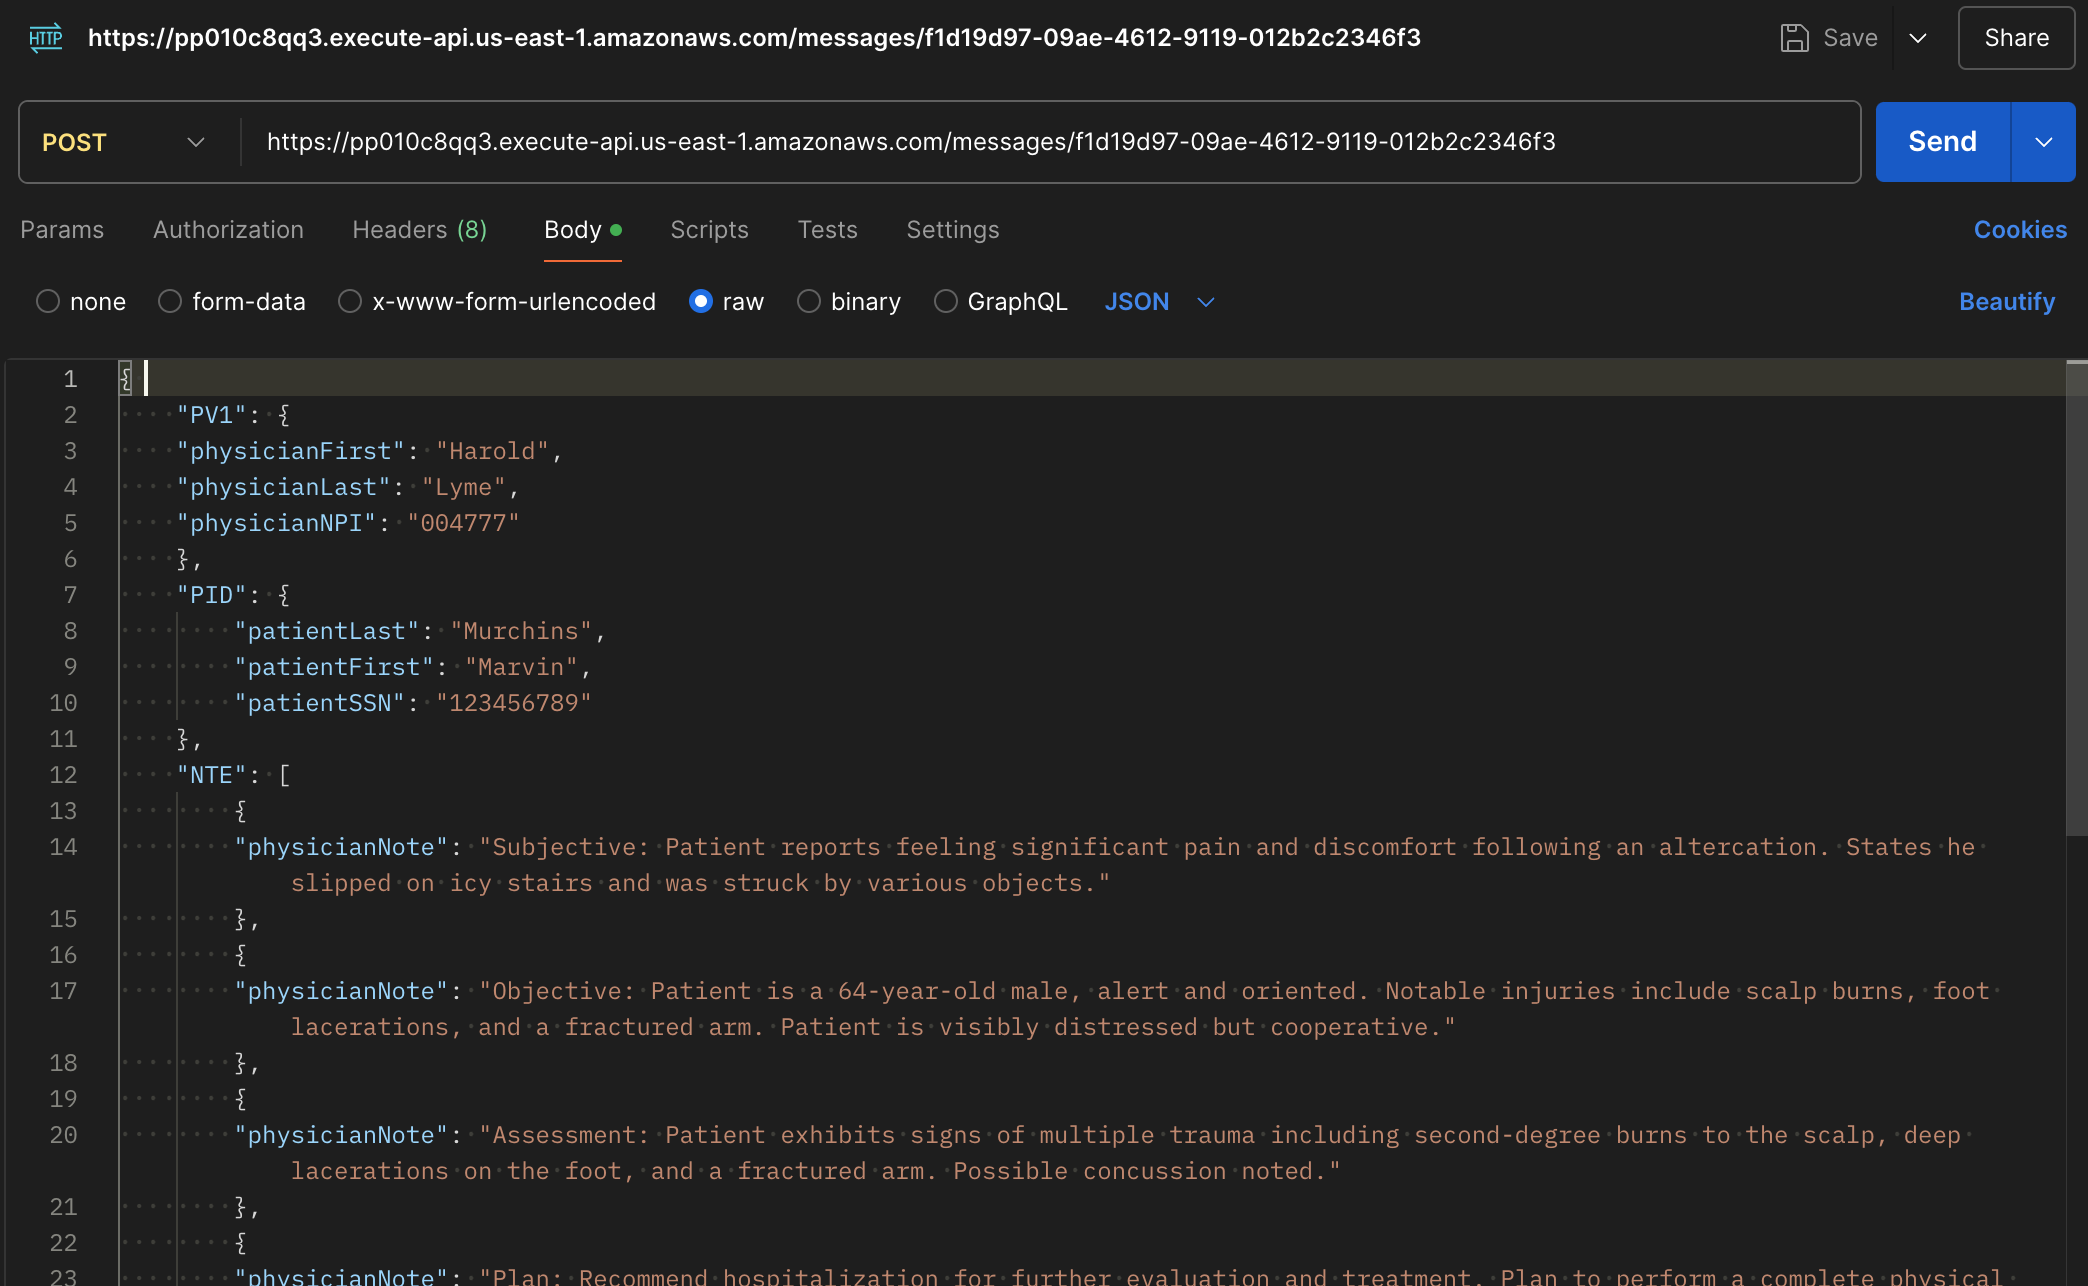
A sample body is provided to facilitate testing and inform you of the expected payload structure.
Testing
After configuring the workflow, you can test it by sending a POST request to the generated API Gateway endpoint. The system will translate the JSON payload into an HL7v2 message and publish it to the EHR.
We make sure the header parameter is set.
Let's create the payload and test the workflow.
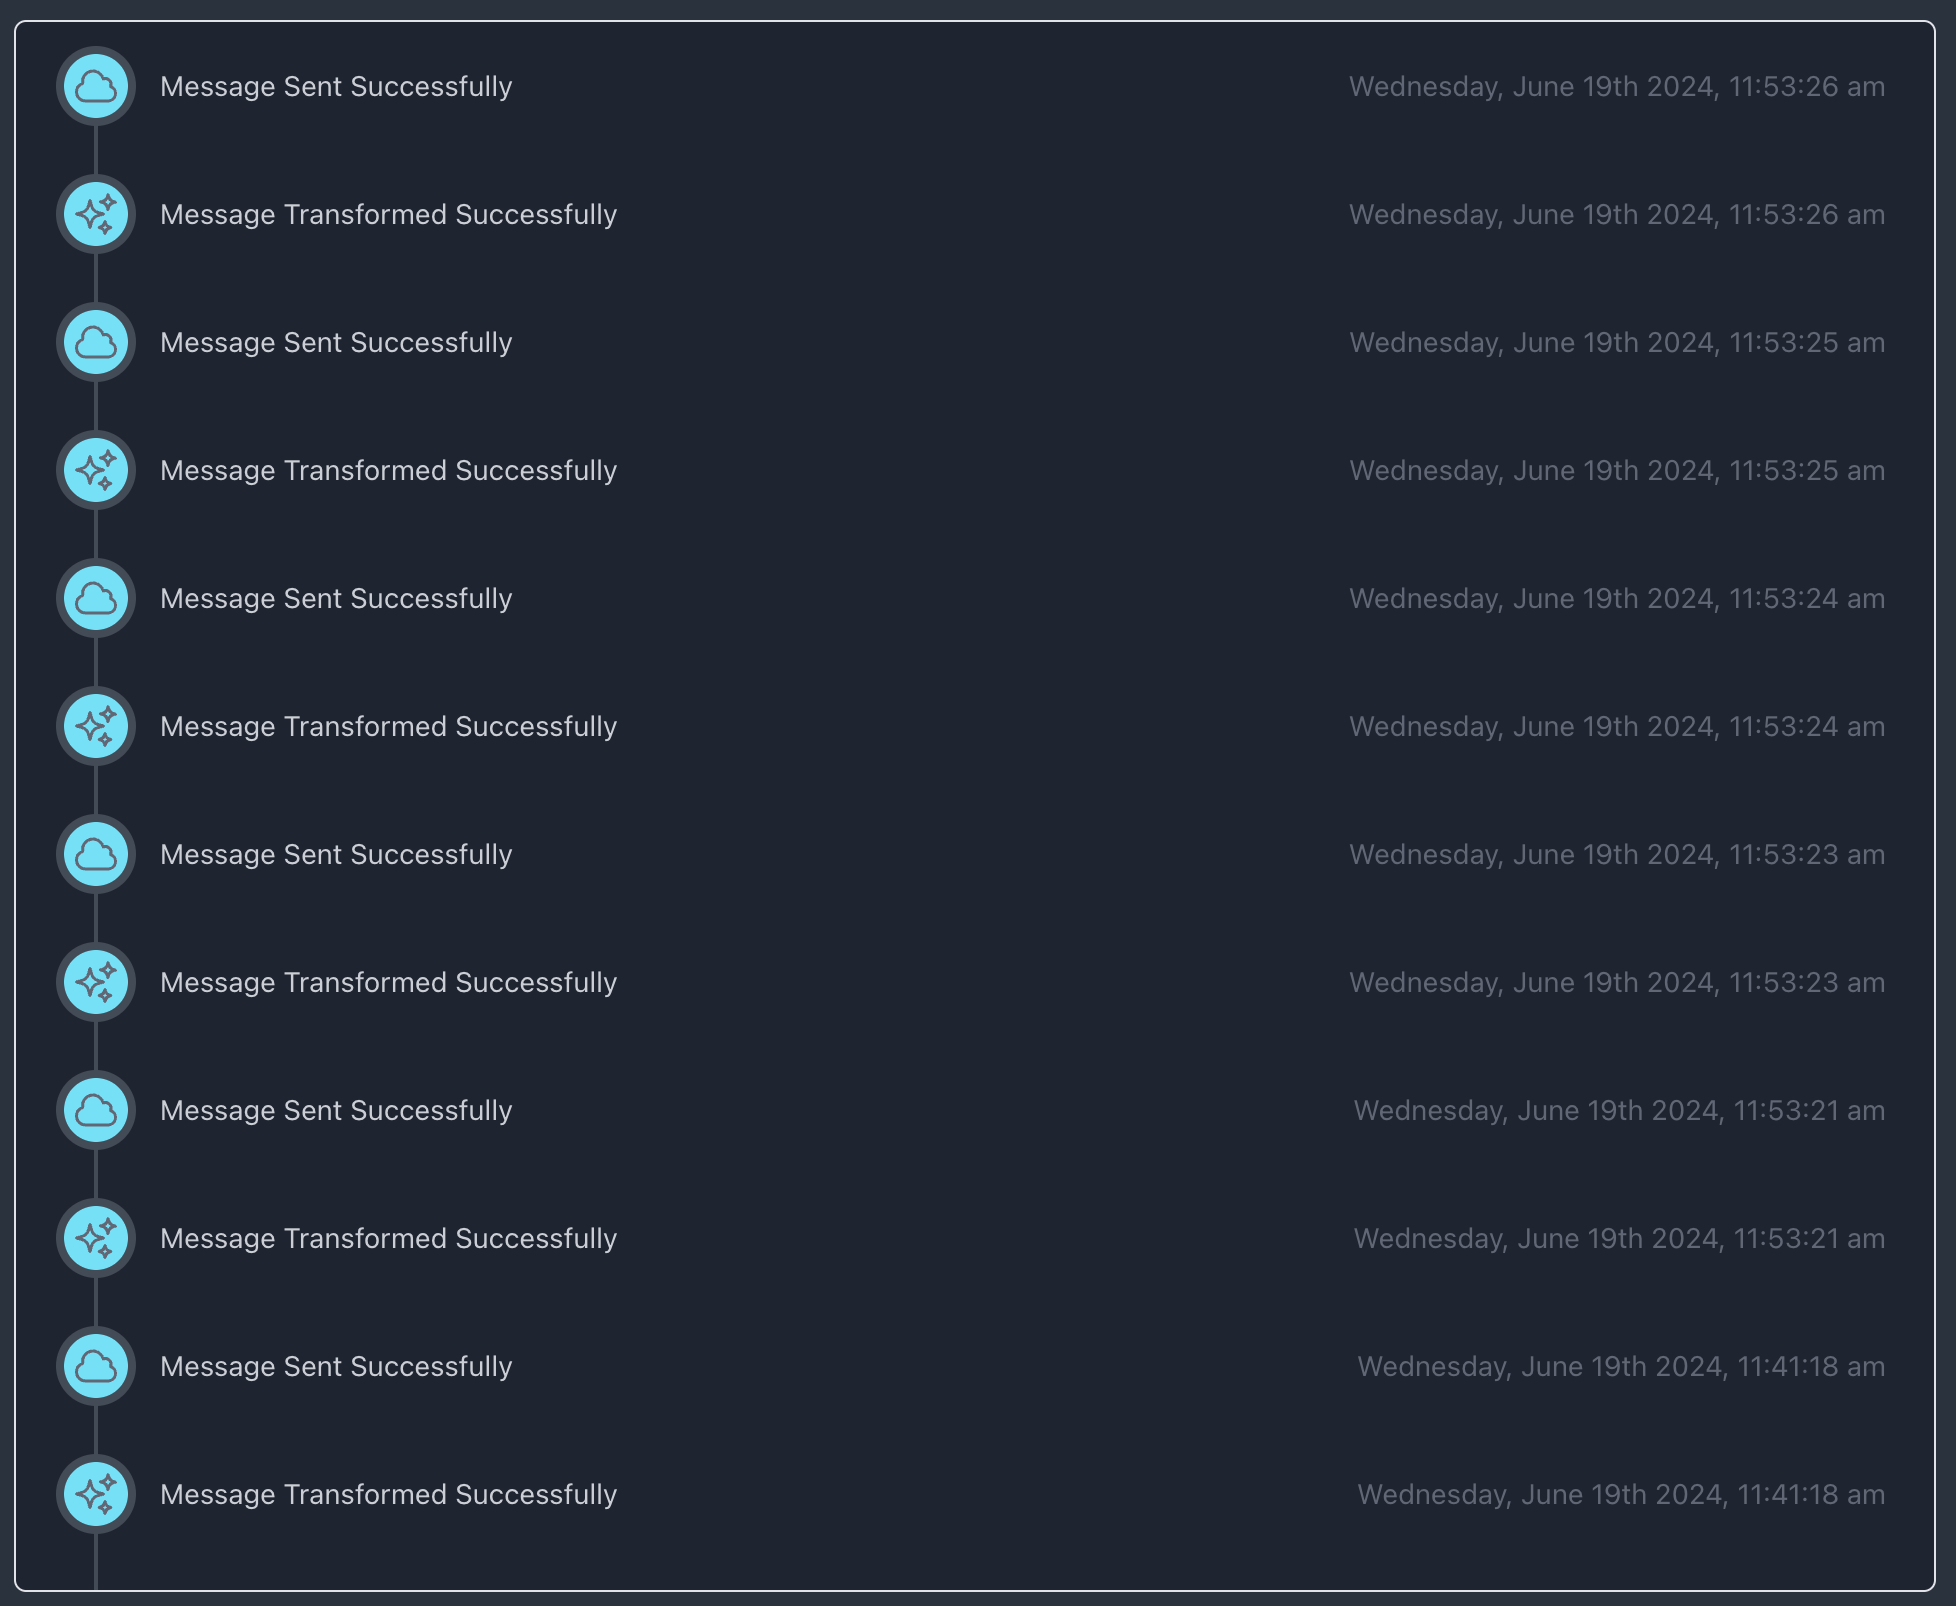
Monitoring
The workflow status is displayed in the UI. You can monitor the status of the workflow and view the message payload just as you can with other workflows.