HTTP POST Quick Start
Capturing HL7v2 messages and sending transformed data to an HTTPS endpoint is straightforward with Retrohook. This guide will walk you through setting up a workflow to capture messages, transform them, and send them to your HTTPS destination.
Let’s dive in with a sequence diagram to visualize the process.
Steps
Create Workflow: Start by creating a workflow in Retrohook to capture HL7v2 messages from the EHR. Give your workflow a name, select mllp as the source, and choose HTTPS POST as the destination.
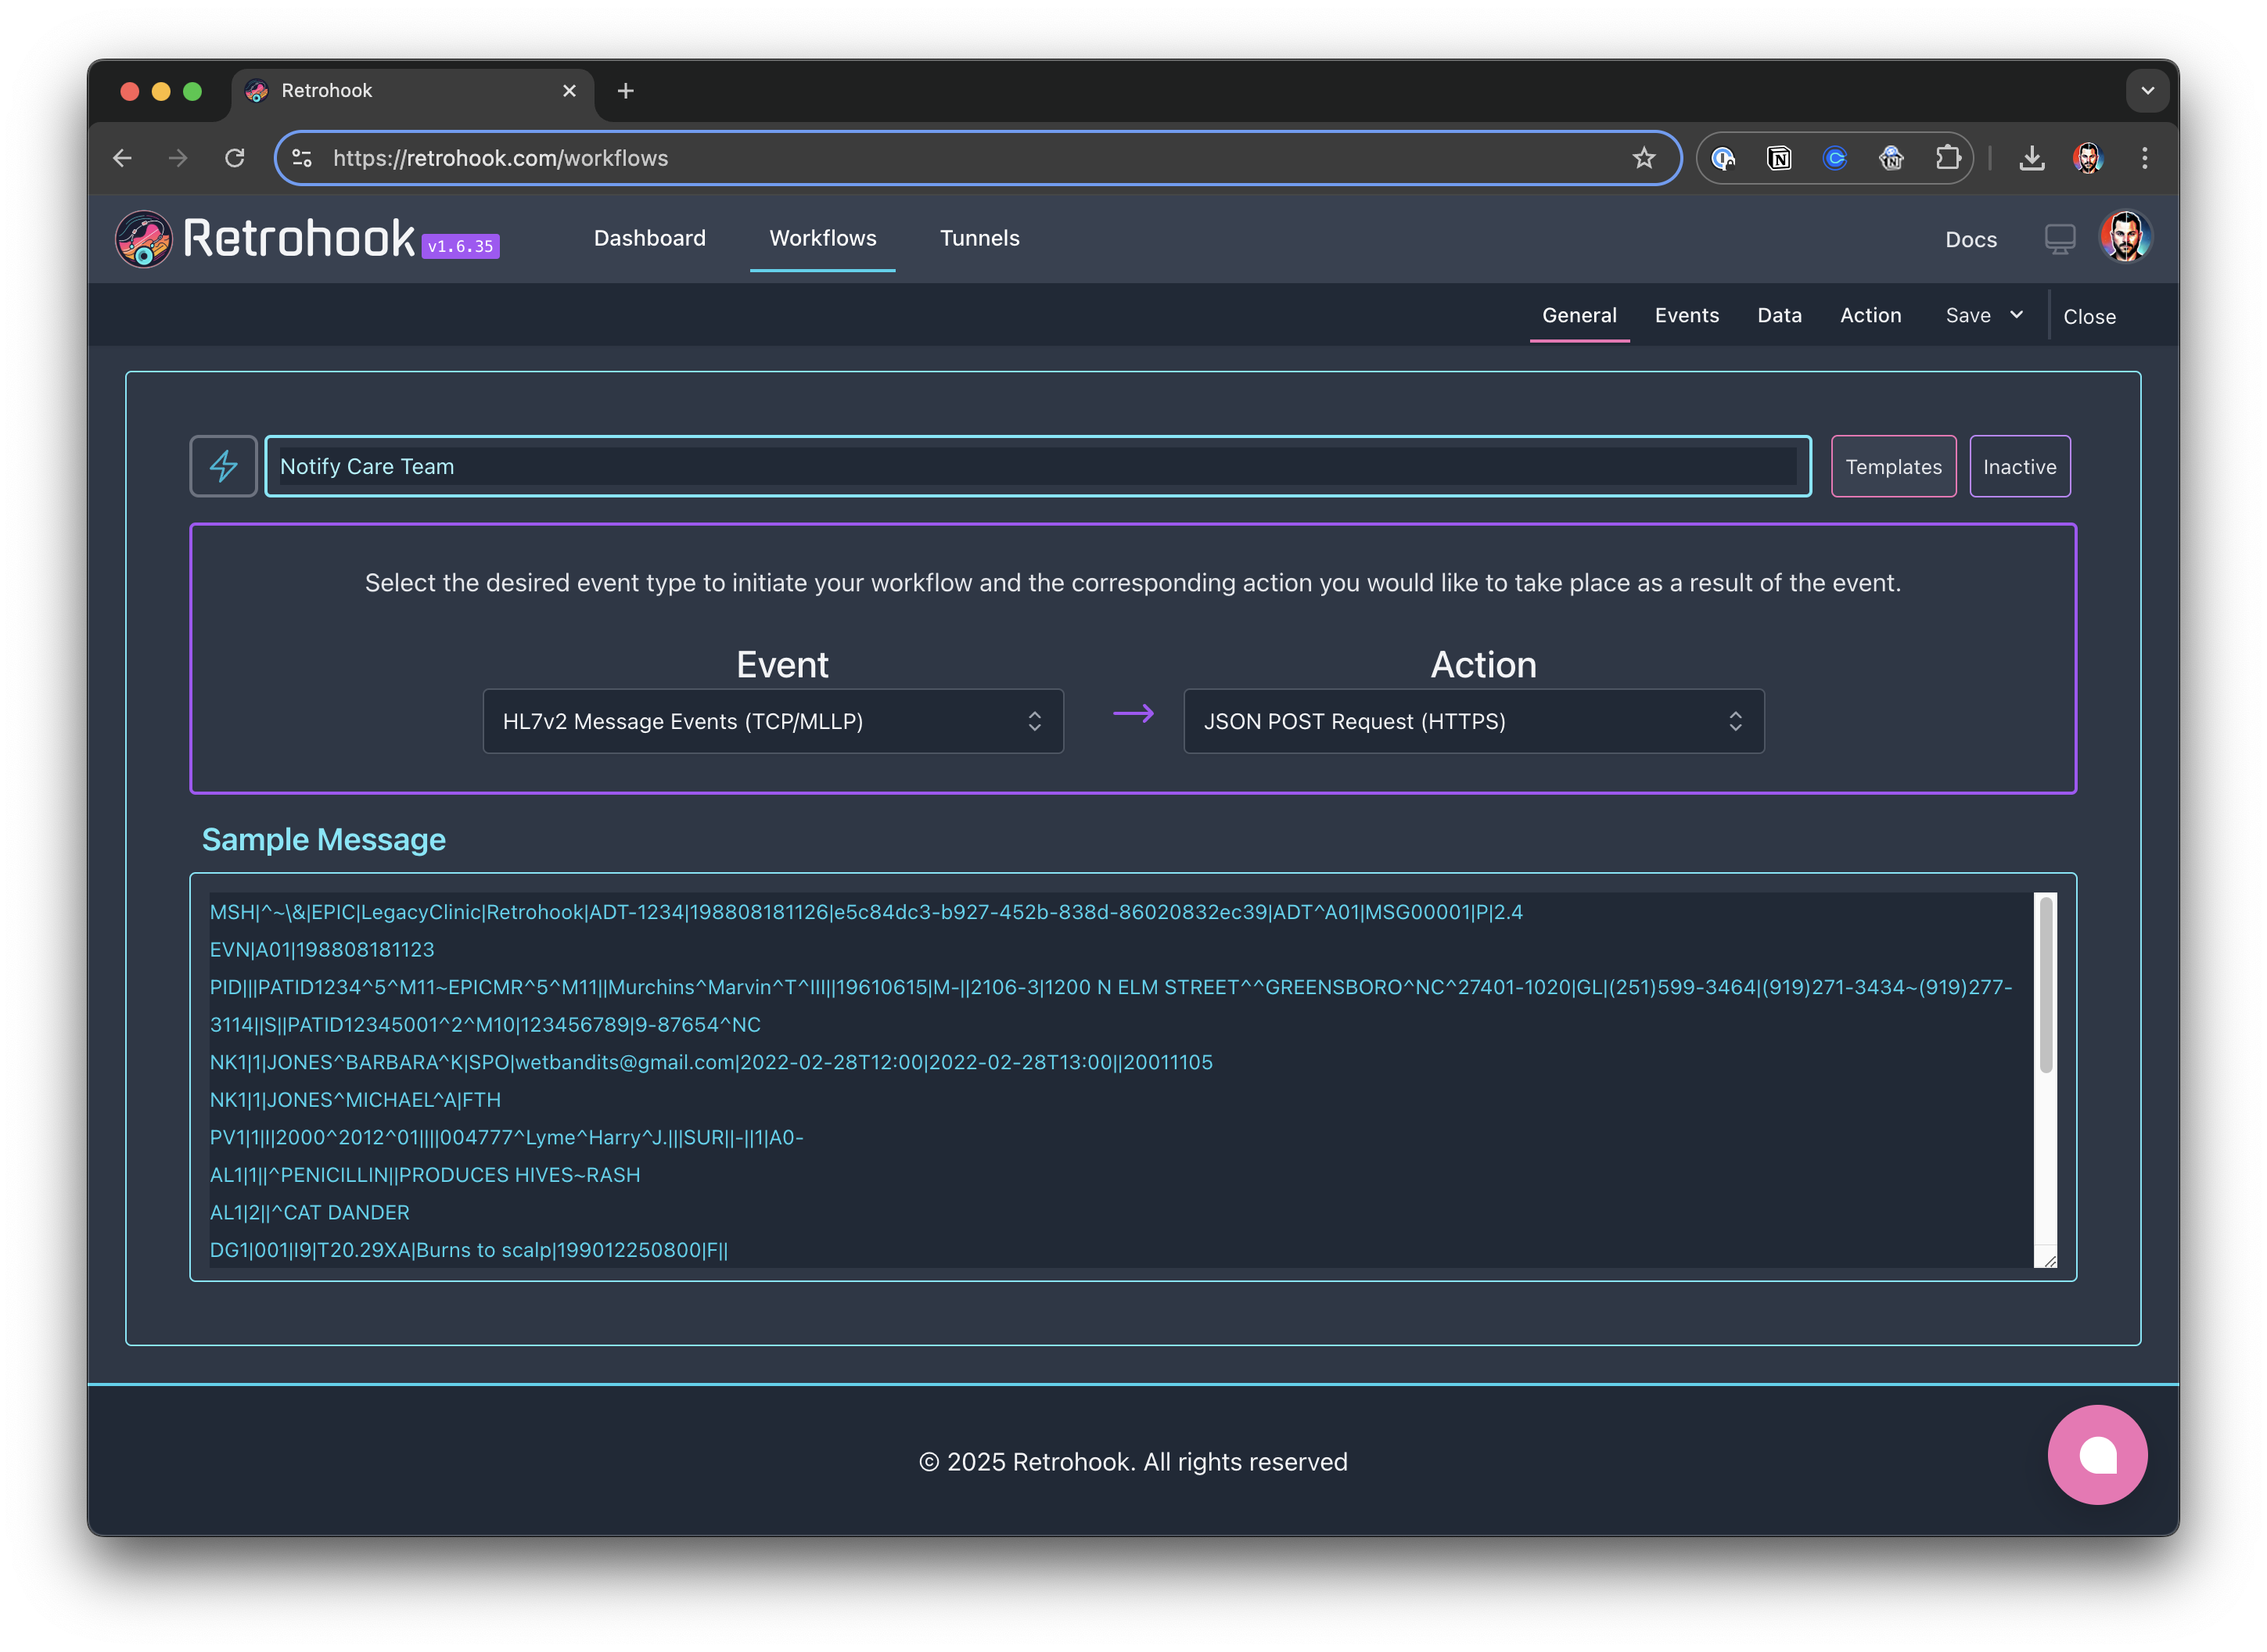
The magic happens when you upload a sample message, which Retrohook uses to tee up the workflow. This allows Retrohook to understand the structure of the messages it will be processing. Driving repeatability from the instructions we generate behind the scenes.
Configure Filters
Set up the capture trigger in the workflow to filter for the HL7v2 messages you need. For example, you can target specific event types or message contents. For this notification we will filter based on the provider and message type.
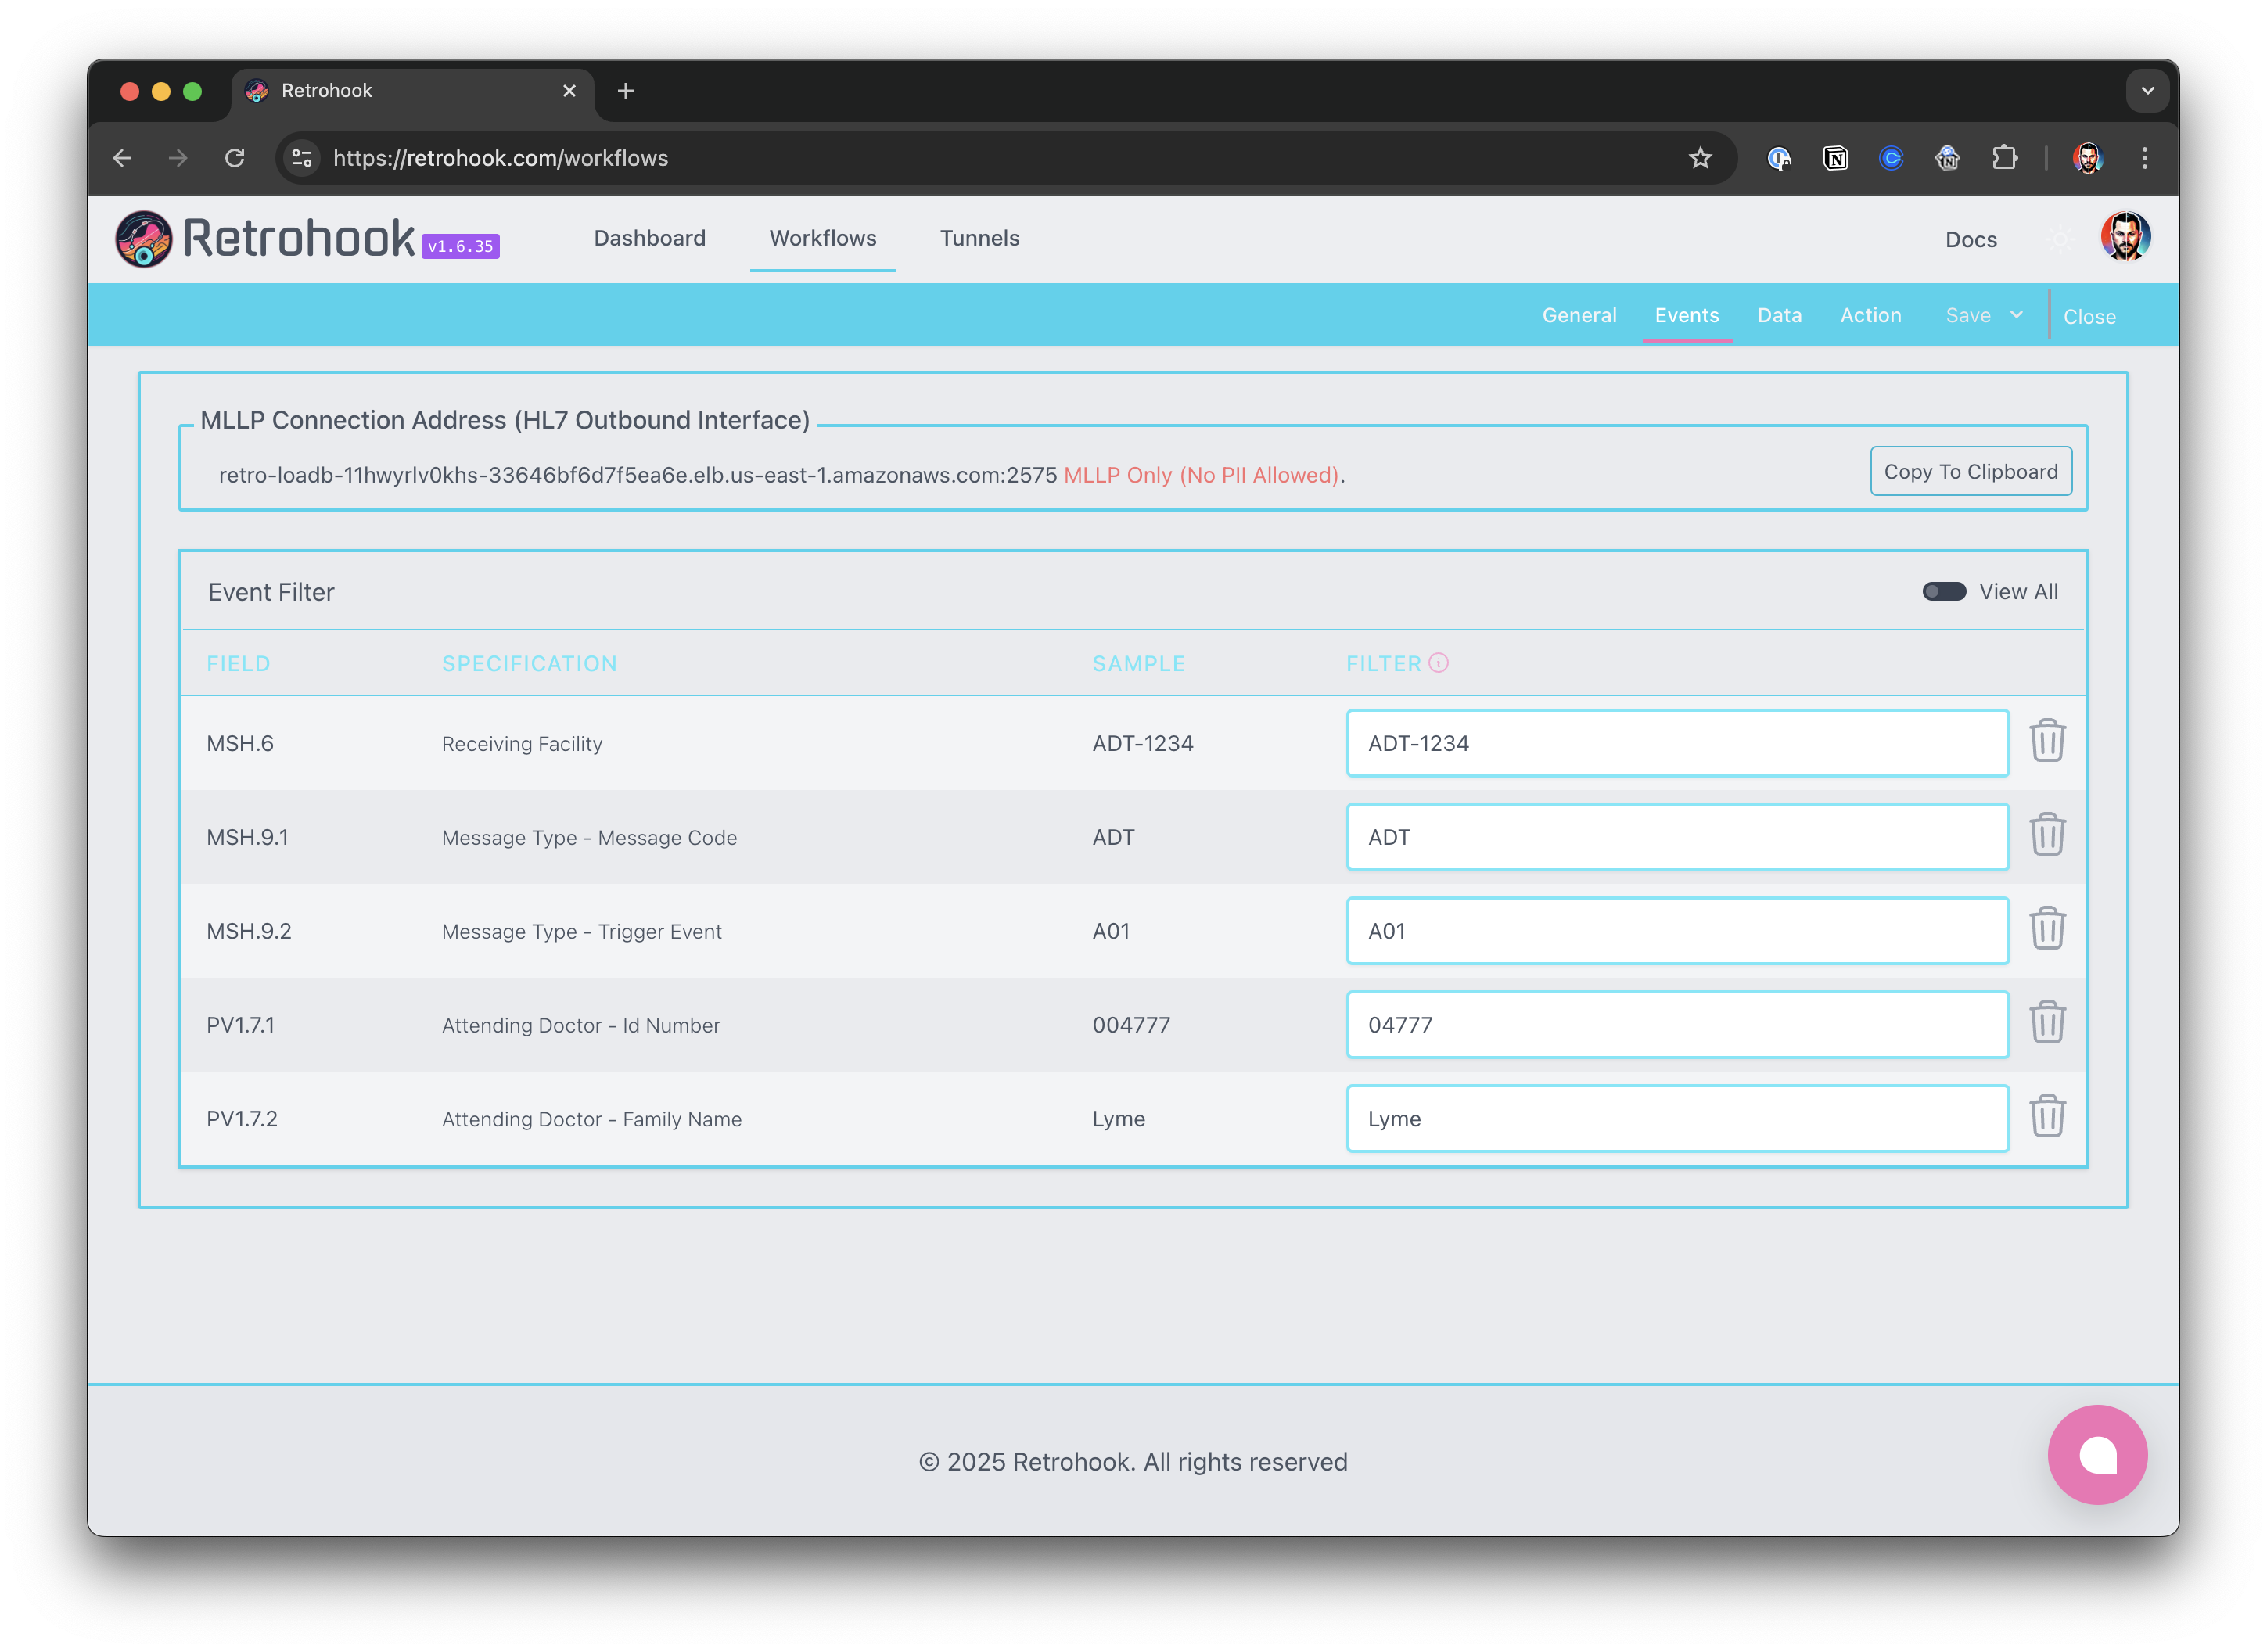
The MLLP server DNS name is the entry point for your EHR system to send HL7v2 messages to Retrohook. This is a unique URL that Retrohook generates for you. The EHR system will use this address to send messages to Retrohook (same as an IPv4 address).
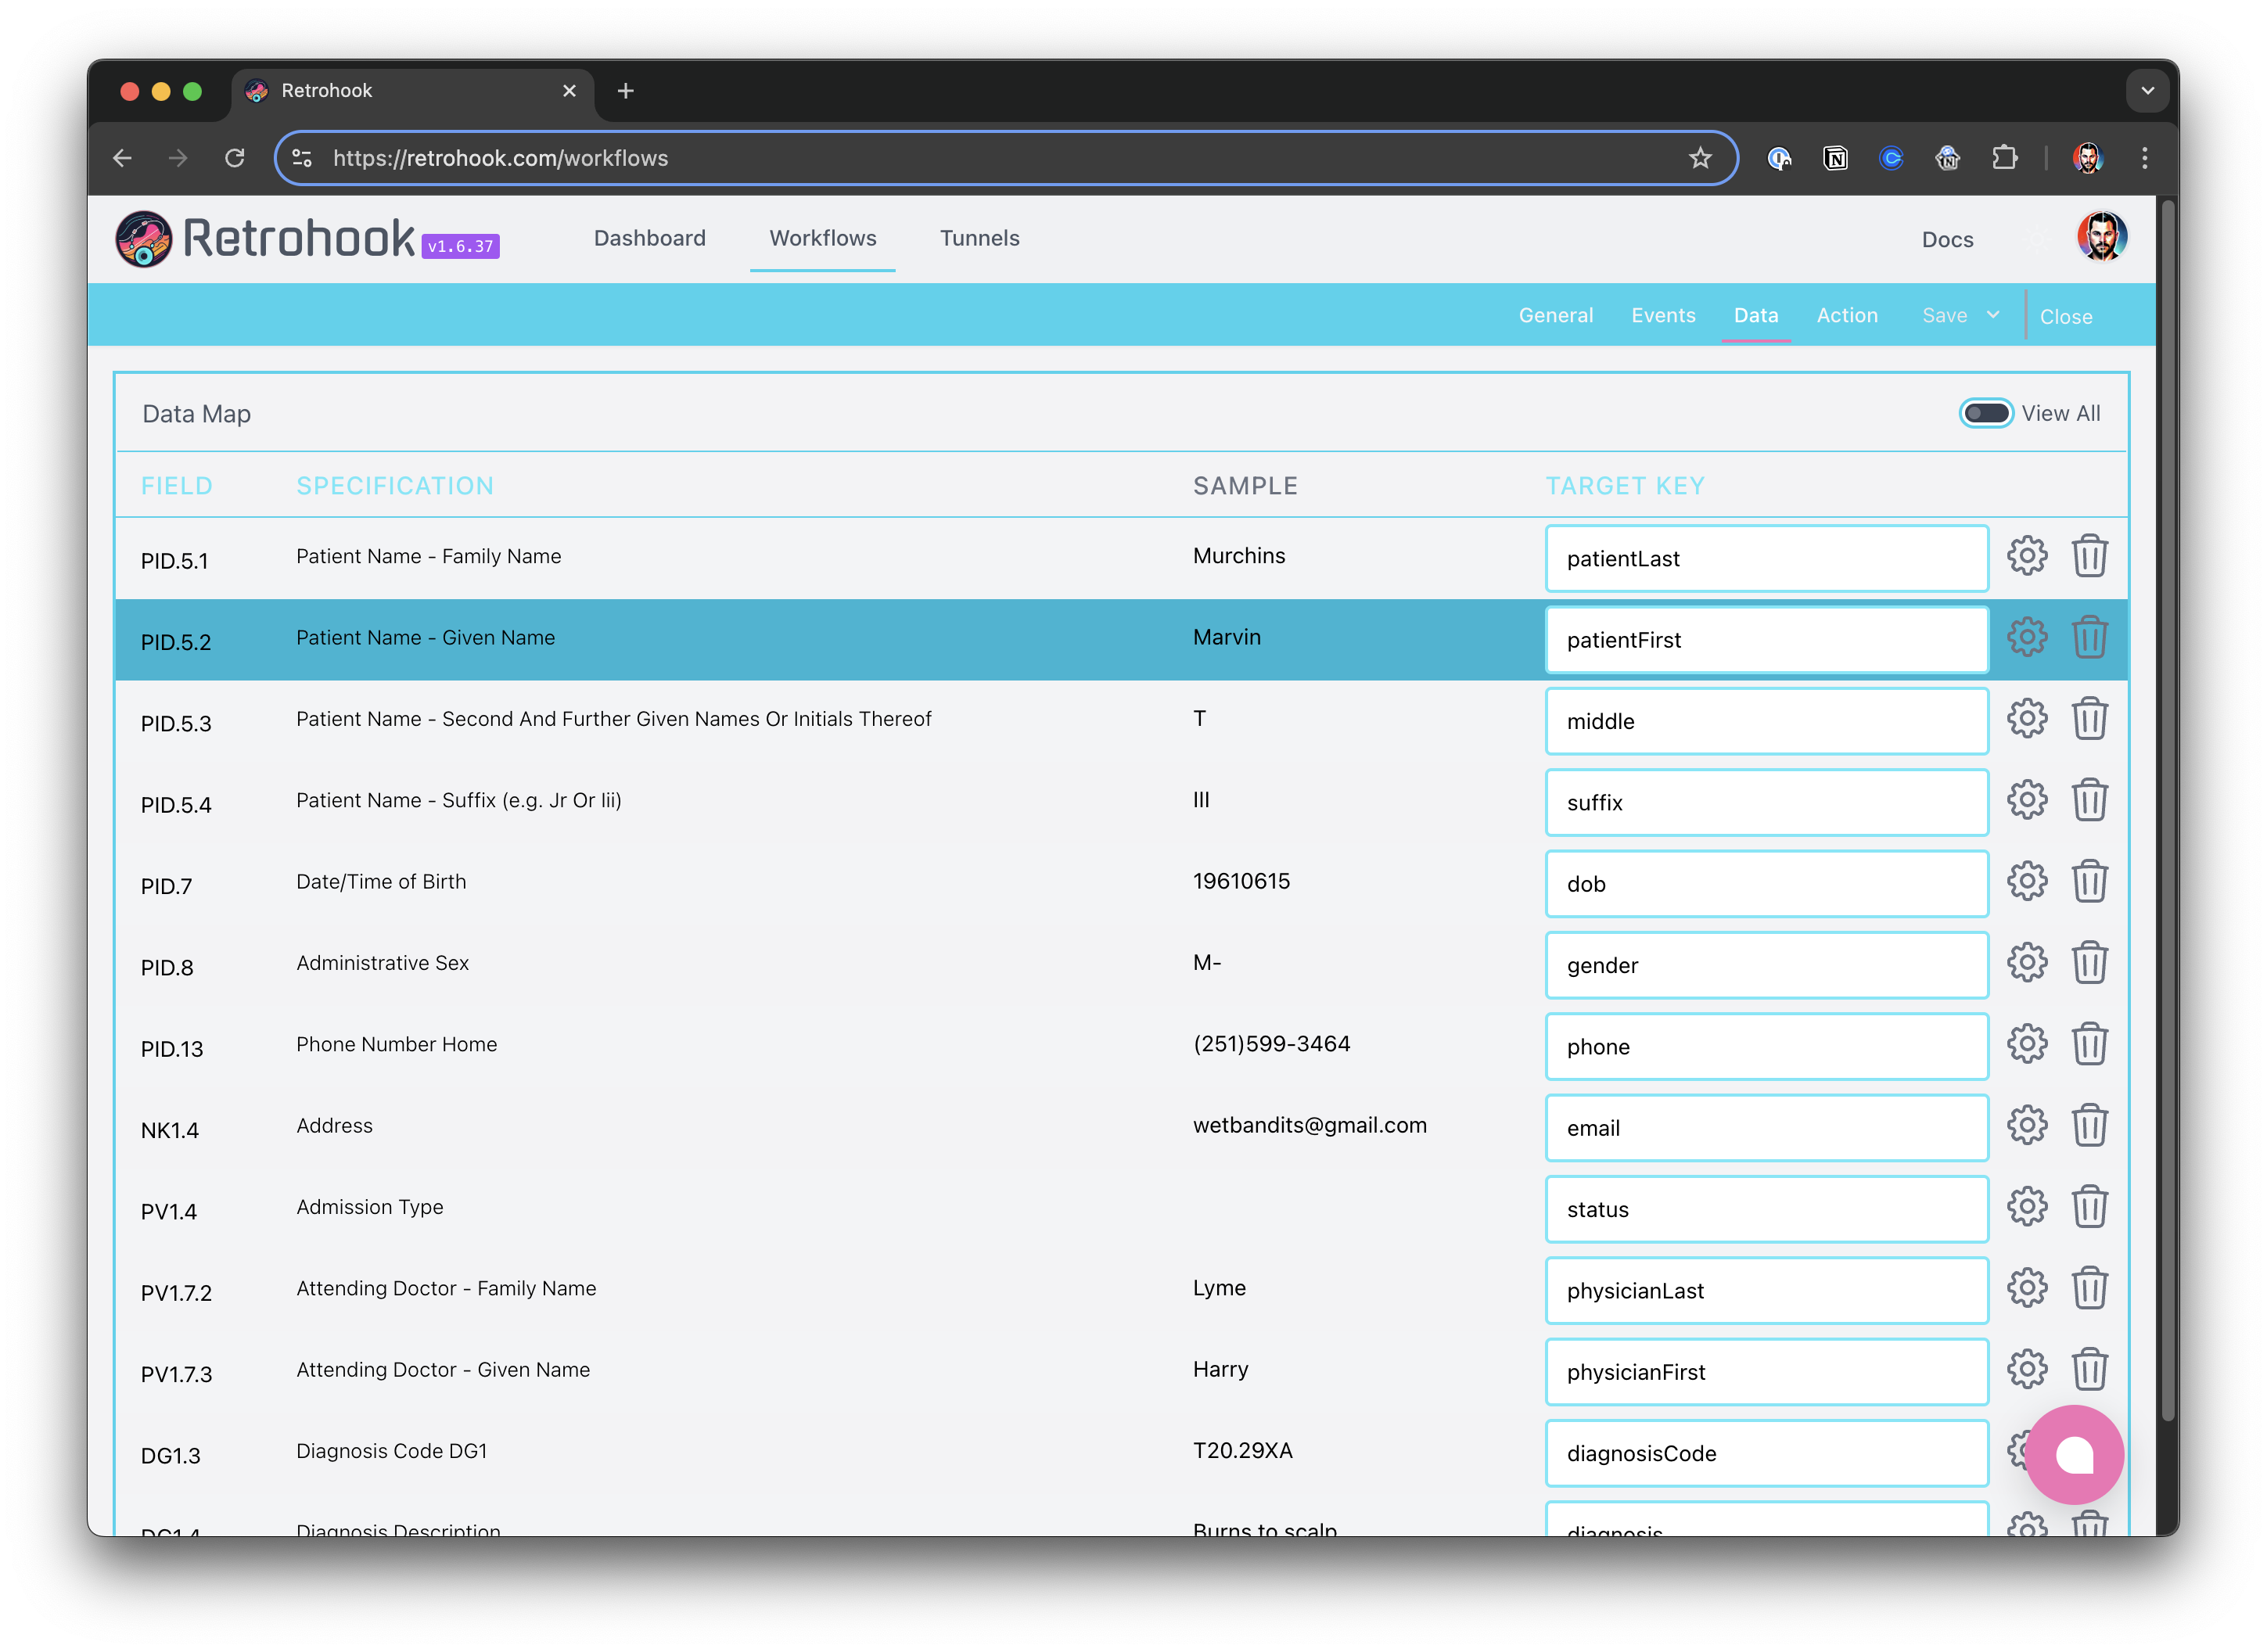
Configure Mapping
Map the fields in the HL7v2 message to the desired JSON structure for your HTTPS endpoint. This allows you to transform and shape the data before sending it.
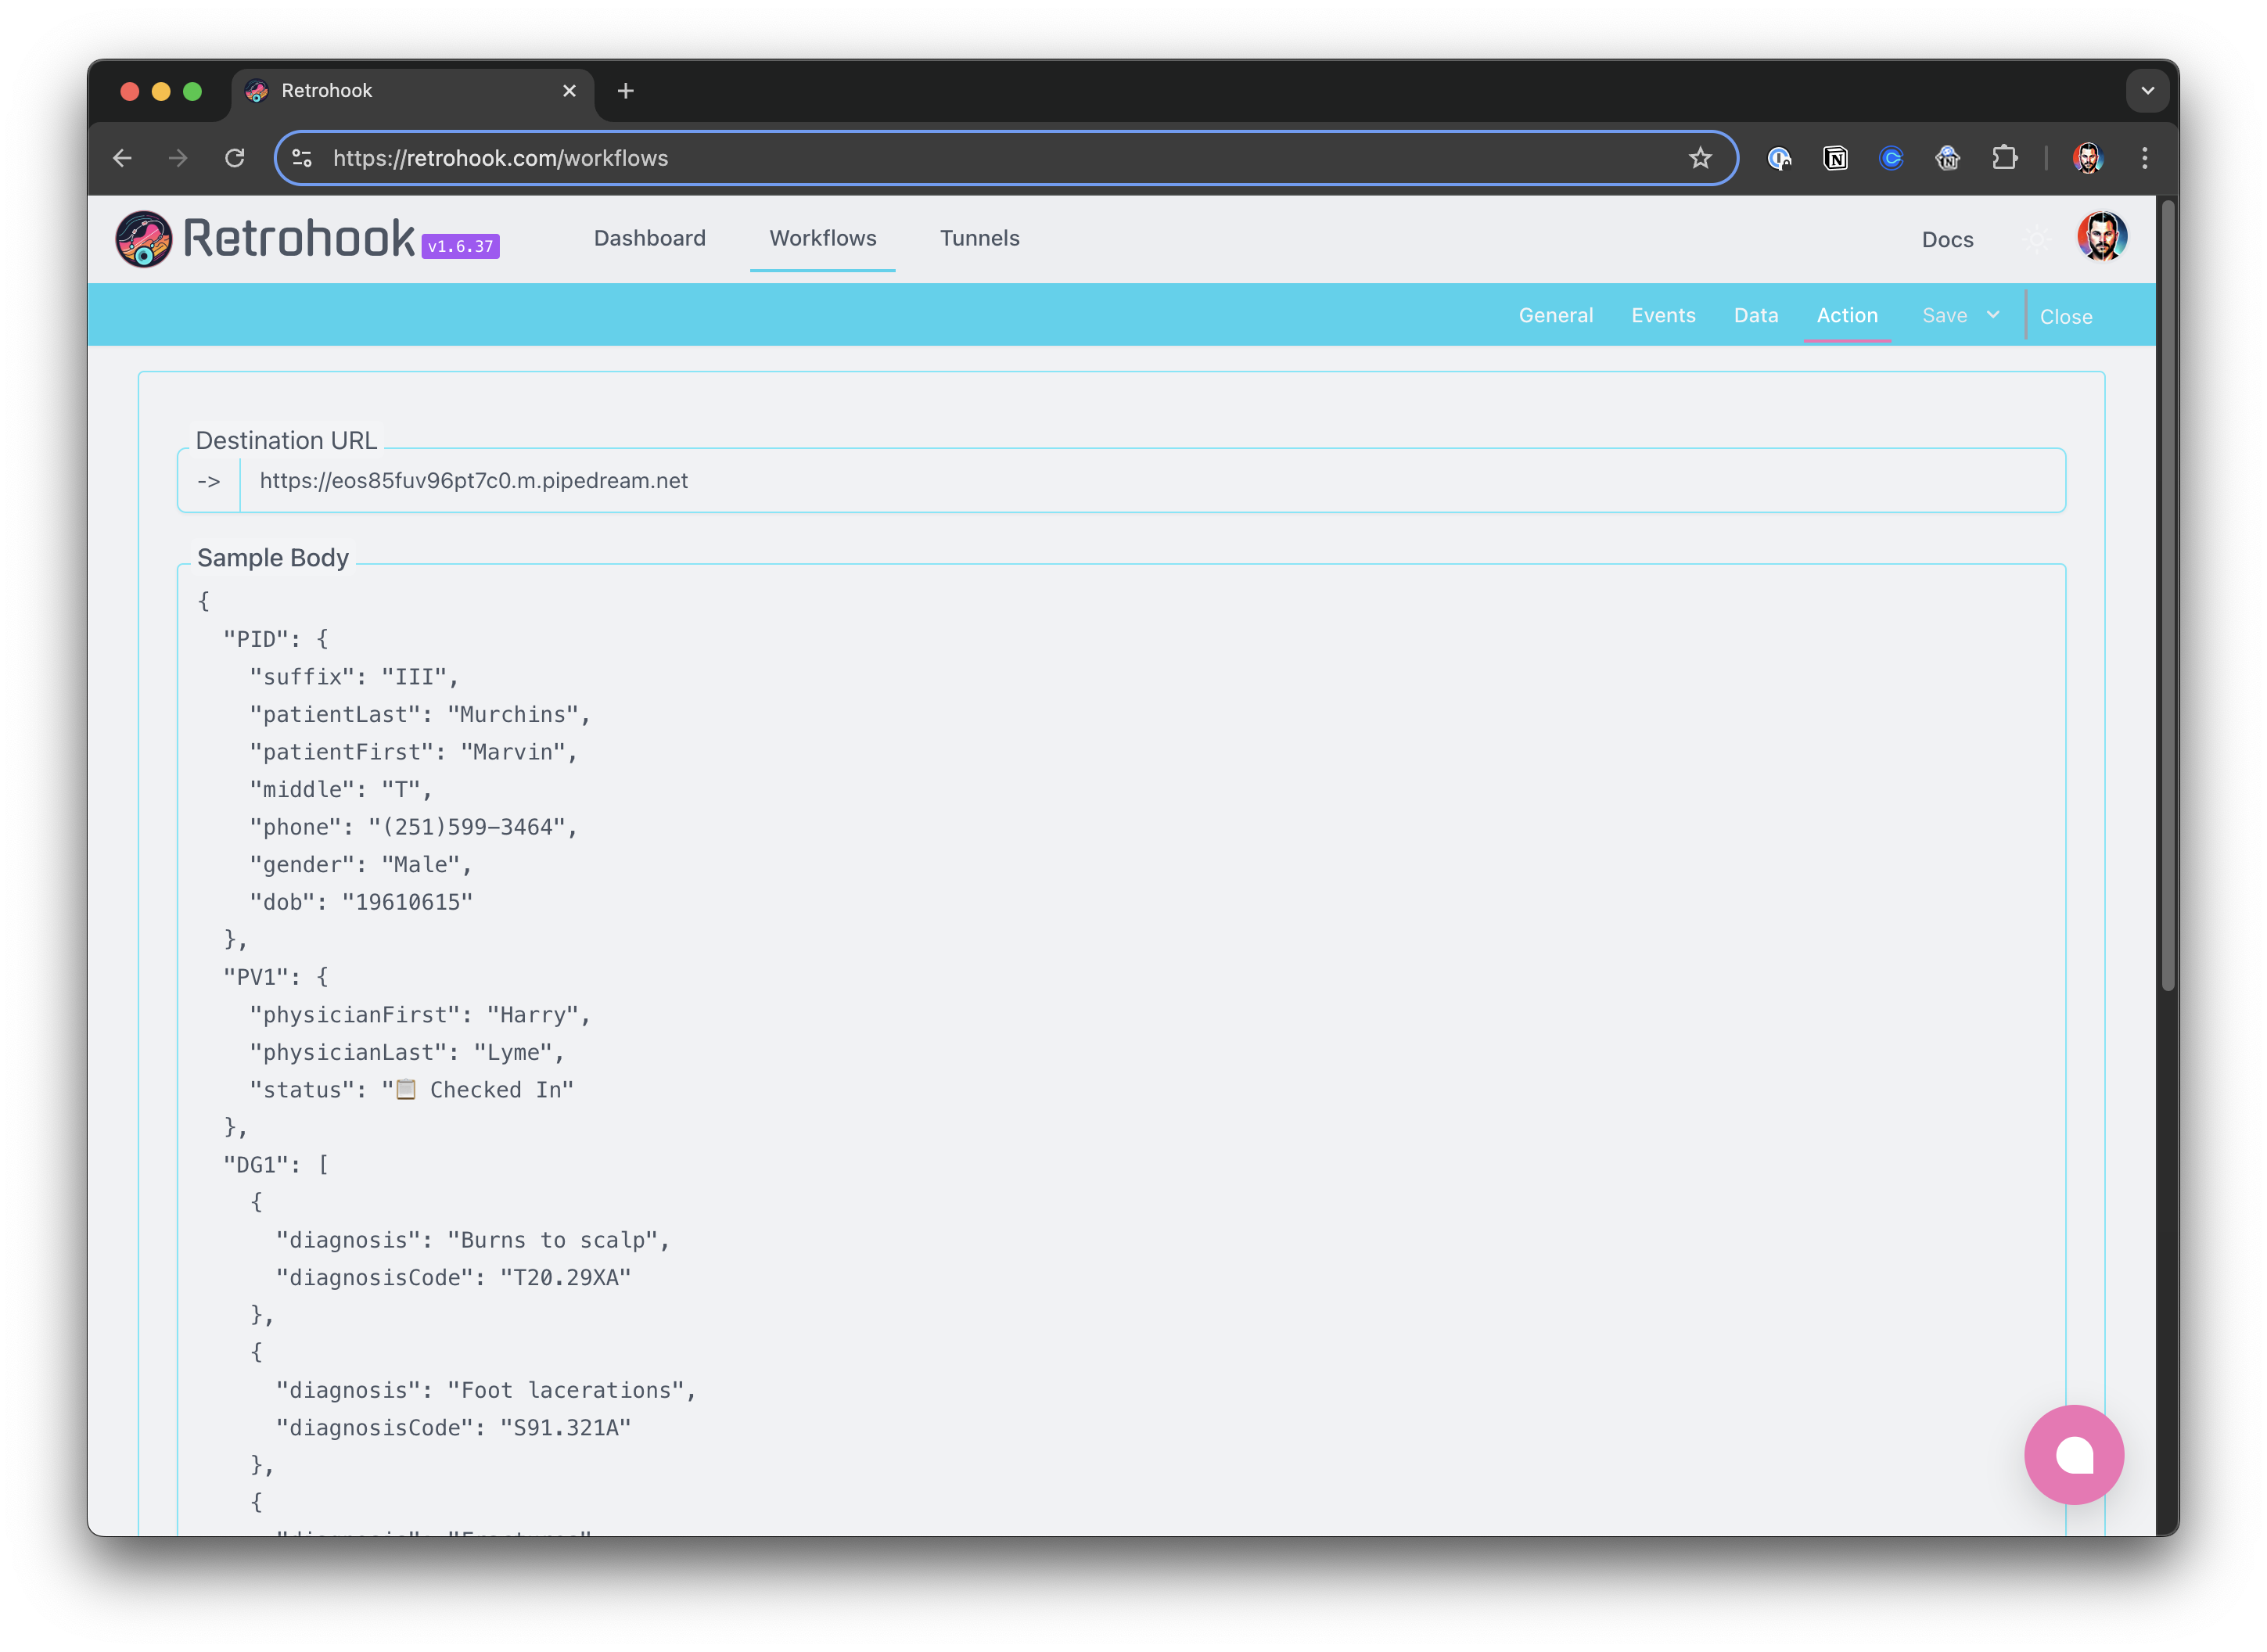
Setup HTTPS Destination
Provide the URL of your HTTPS endpoint in the destination configuration. You can also see a preview of the transformed message.
Send HL7v2 Messages
Once your workflow is set up, copy the entry point (provided at the top) and add it to your EHR system’s outbound configuration.
🎉 Messages sent to the entry point will be captured by Retrohook, transformed, and sent to your HTTPS destination.
Reference
Environment and Tunnel setup are necessary to connect to the EHR and capture HL7v2 messages. Here is a quick overview of the steps required to setup the environment and the IPSec tunnel using Retrohook.
Steps
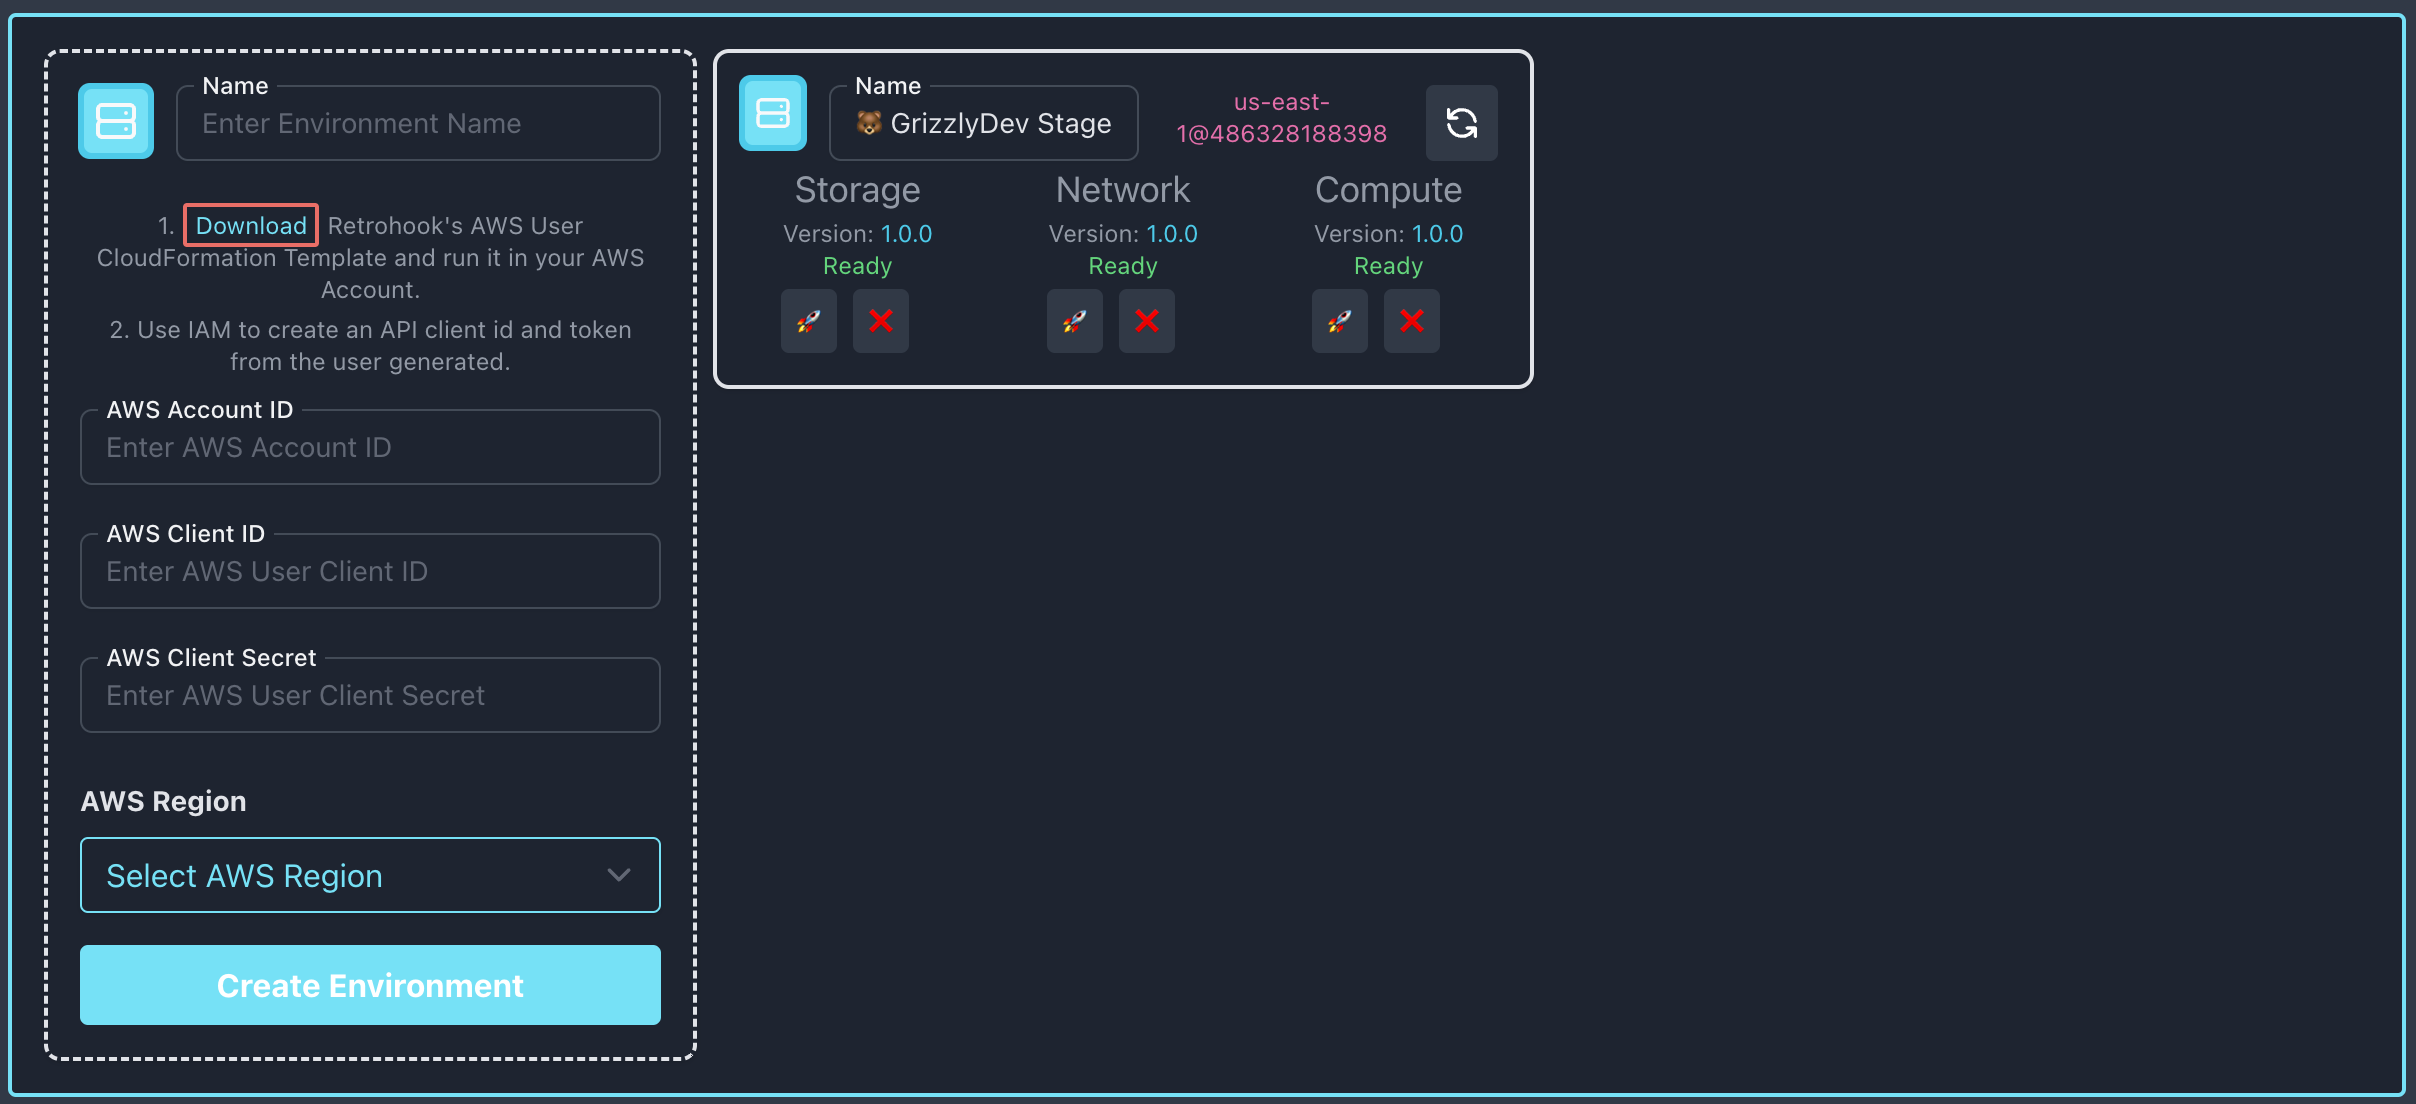
- Retrohook Environment: You need to have a Retrohook environment setup in your VPC. This is a one-time setup and is required for all destinations. You may have already done this if you are using Retrohook.
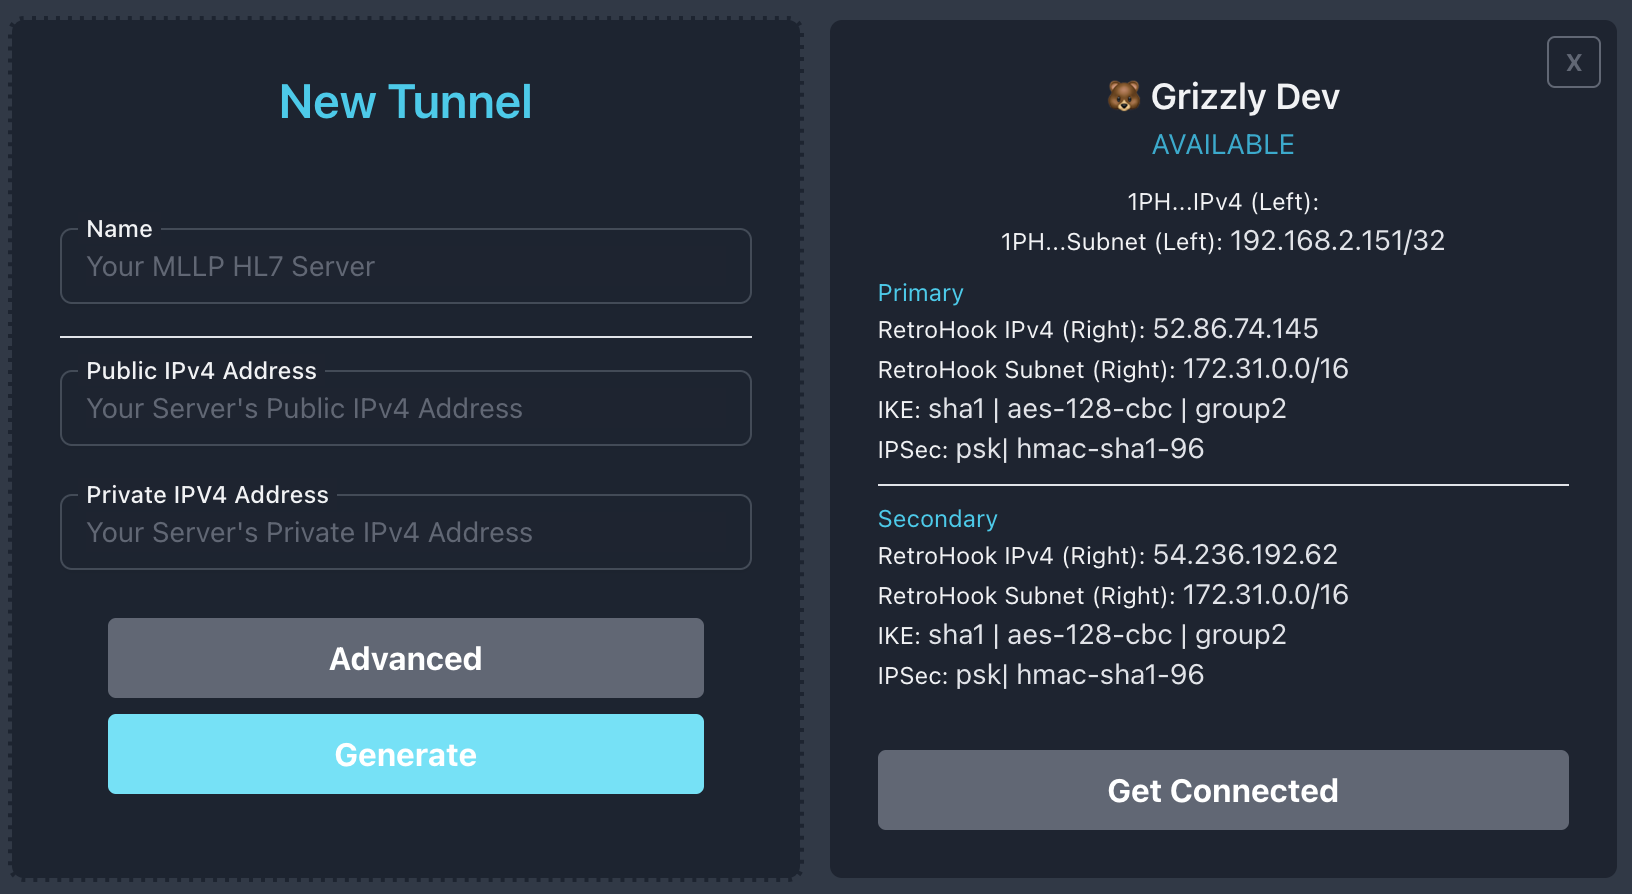
- IPSec Tunnel: Once you have deployed Retrohook to your ☁️ environment, you will need to generate an IPSec tunnel to the EHR. This is a secure connection between your VPC and the EHR network. This is required to connect securely.
Once you finish the setup, you are ready to start creating workflows that surface HL7v2 messages to the S3 destination.